Powered By Blogger
Visualizzazione post con etichetta this is not a food blog - questo non è un food blog. Mostra tutti i post

mercoledì 12 novembre 2014

rainey day baking pioggioso giorno di panificazione

Rainey days have that wet cold damp nasty feeling which sort of makes you want to keep the oven going full speed on whatever comes into your mind. A new friend on FBook happened to post this simple baking powder bread recipe which I adapted to a focaccia type loaf. A  bit of honey to give it a slightly sweet taste and voilà! Sliced and in the oven again to become 'biscotti' for breakfast or for munching. Thanks  Begoña  for the recipe! Next time gonna add more honey and some cinnamon.

This Récipe is with gluten.It's the honey bread .Well,245gr.of whole wheat flour,105gr. of white flour,280 -300gr. of water,7gr. of salt,15gr. of baking poder and one hable spoon of honey.Your knead al the ingrediente in a bowl, put into the mole and baking about 30-40' _230° during 5-10' and after that you put the oven in 200° until the end.Be carefull with the up-resitance.You can mix whatever flour your want it ,the importante is the %.


Giornate di pioggia tendono a far sì che rimanendo in casa e non avendo ancora acceso riscaldamento mi viene voglia di forno, caldo e profumo di pane. Questa ricetta è perfetta perche non ha lievito di birra ma semplicemente polvere lievitante tipo Pizzaiola...un pochino di miele per darlo un sapore minimo di dolce e il calore e profumo di pane che espande per la cucina riscalda l'anima...grazie Begoña per la ricetta...adesso le fettine fatte delle focaccia(forma scelta da me per cucinarlo questa volta - prossimo giro pagnotta) sono nel forno a biscottare

245 grammi farina 0
105 grammi farina integrale
280-300 grammi acqua (metti metà del acqua in una ciotola e dentro questo sciogliete 1 cucchiaio di miele) 
1 bustina 15 grammi lievito pizzaiolo
un pizzico a tre dita di sale...
mescolare tutto insieme e poi impastare leggermente...
a forno 220 gradi infornare per 30 minuti poi abbassare a 200 gradi per un altro pochino...
diciamo che voi che avete forni tecno dovete arrangiarvi nelle temperature e tempi...
prossimo giro metterò pure cannelle e piu miele...




sabato 1 marzo 2014

SALAD INSALATA

A picture is worth a thousand words...Let's just say that Spring is in the air forever lately. Winter never showed up in our end of the boot-shaped pensinsula. The results are obvious! Above!

Una foto vale più di mille parole...diciamo solo che Primavera è nel aria da sempre ultimamente. Inverno mai arrivato qua nella nostra parte della penisola a stivale. I risultati sono ecclatanti! Sopra!


mercoledì 26 febbraio 2014

BANANA CAKE TORTA DI BANANA


As promised in the preceeding post a fabulous, no, THE MOST FABULOUS banana cake ever...probably because it was made by my maternal grandmother, NAHMOE.

1/4 lb. softened butter
1   1/4 cup sugar
2 eggs
1 teaspoon bicarbonate of soda
4 tbsp  whole fat Greek yoghurt
1 cup very ripe bananas all mashed up
1  1/2 cup flour 0
1 teaspoon vanilla extract
Cinnamon to taste
pinch of salt
1 cup chopped walnuts

Heat the oven to 350° -
In a cup mix  whole fat Greek yoghurt with the bicarb - it foams up so don't get agitated if it does!
Then cream butter to which you then add the sugar and vanilla extract  whipping really well until fluffy. Add the eggs one at a time. Then add the flour which you have mixed with cinnamon, pinch of salt and yoghurt alternating until both are mixed in...then fold in the bananas and the walnuts...all done.

pour into a buttered and floured poundcake tin - I use a rather large one...
place on the middle rack of the oven and bake till golden - in my static gas stove it takes 45 minutes...
once baked, remove from oven and cool till the cake comes away from the sides of the pan. Tap gently onto the rack after you have turned the tin upsidedown...cool completely and it is ready to eat. I never frost this cake since I prefer without frosting but feel free to add your favorite frosting.


Come promesso nel post precedente ecco la ricetta della torta di BANANE nelle foto...quella della mia nonna materna NAHMOE. E' un non plus ultra di torta banana...davvero.

120 grammi burro morbido
280 grammi zucchero semolato
2 uova
1 cucchiaino da thè bicarbonato di sodio
4 cucchiai da minestra yoghurt greco intero
225 grammi banane mature schiacciate
340 grammi farina 0
1 cucchiaino sale fino
un paio di pugni di noci trittate grossolanemente
cannella in polvere a piacere
1 cucchiaino da thè estratto vaniglia

Scaldate forno a 180°

Mettete lo yoghurt in una ciotola e mescolarvisi dentro anche il bicarbonato che farà una bella schiuma.
Poi sbattere in un altra ciotola il burro affinche morbido e vaporoso. Aggiungete poi lo zucchero facendo stesso lavoro. Poi di seguito un uovo alla volta...alla fine aggiungete vaniglia estratto e lo  yoghurt e farina nella quale avete precendentemente messo cannella e sale fino...sbattere bene e poi mescolate delicatemente dentro impasto le banane e le noci a pezzetti grossolani.
La torta poi va messo in una forma da plum cake grande che avete precedentemente imburrata e cosparsa di farina.
Infornare a 180° nel mezzo del forno per piu o meno 45 minuti. Il mio forno statico a gas vuole questi minuti...altri forni forse meno...
Finito cottura levate torta dal forno e raffredare affinche i bordi non si staccano dai fianchi della teglia...a questo punto levate torta dalla teglia e raffredare del tutto. Io non metto ne glassa ne altre creme su questa torta perche preferisco 'ignuda'...però fate vobis


martedì 25 febbraio 2014

WASTE NOT SPRECARE MAI

The expression waste not want not has always been a part of my everyday life. So when our dog started having gum problems I had to start using an industrial dogfood which, by the way, comes in marvelous alluminum containers.

L'espressione non sprecare per non averne bisogno è sempre stato una parte della mia vita di tutti i giorni. Così quando la nostra cagna anziana ha cominciata avere problemi di gengive ho preso in mano la situazione comprando scatolette di alluminio pesante meravigliose.

As you can see the containers are, let's say, about 250grams of dogfood and when they are empty and cleaned to perfection hold about 150 grams of cake dough or whatever dough. I can see your faces BLEAH! you're saying but actually the waste not part of me put the day by day tins into hot water, removed the label on the back and then cleaned them to perfection....

Come vedete potete vedere che i contenitori sono circa 250 grammi di carne per cani e quando sono vuoti e puliti a perfezione contengono poi 150 grammi di impasto torta o quantaltro. Posso proprio vedere le vostre facce BLEAH!!! state dicendo ma veramente non vedo perche buttare via contenitori di alluminio pesante solo perche erano per carne cani. Ogni giorno ne metto un contenitore in acqua calda levando con cura l'etichetta e poi le pulisco a perfezione...

As you can see once it is cleaned, buttered and dusted with nuts...looks just like the expensive bought ones.
Come vedete dalla foto sopra una volta pulita, imburrata e cosparsa di nocciole...sembra tipo quelle comprate.

Once the cake is baked...you're wondering why you never thought about doing the same thing right?
I must, however, ask you all a favor...if you see my HUB please don't tell him I put this in FB...he has the feeling folks might not like to bake their cakes in dog container alluminum tins.. che idea! recipe for my favorite banana cake coming up in another post!

Una volta finita la torta...state pensando ma come mai non ci ho mai fatto questo? Però vi devo assolutamente chiedere un piacere...se vedete mio SPOSO per favore NON dirlo che ho messo questo in FB...ha avuto il pensiero che magari alle persone non piacerebbe infornare le loro torte in contenitori alluminio usati in precedenza per cibo cani...che idea! La ricetta per la mia torta di banana preferita più tardi in un altro post.


venerdì 14 febbraio 2014

PUNTARELLE

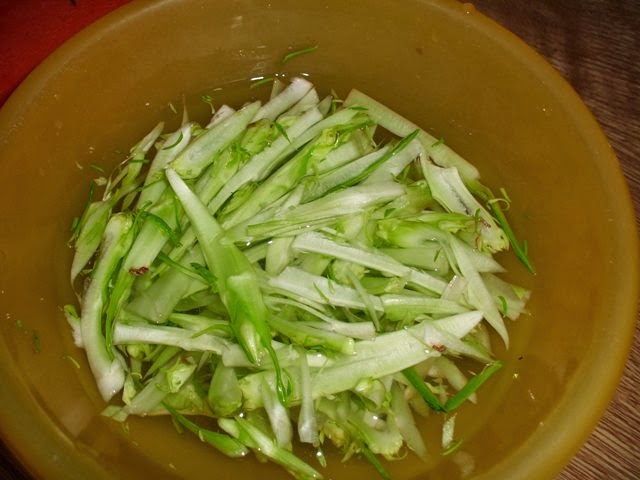
A friend on FB recently posted a wonderful article about PUNTARELLE and a little tool to cut them into well, puntarelle...for years I have been doing them with a knife. Luckily I have never sliced off bits of fingers into the final ice water bath which 'should' curl them up...as you can see my Western Ligurian Puntarelle don't curl...lazy devils! For the post on Puntarelle go to


Un amica in FB recentemente ha postata un articolo bellissimo su PUNTARELLE e un piccolo attrezzo che le taglie in beh, PUNTARELLE...da anni le sto tagliando a fettine finissime con un coltello. Fortunatamente non ho mai affettato le dita dentro l'ultimo bagno in acqua gelata che 'dovrebbe' farle arricciare...cosa che in Ponente Liguria le Puntarelle non fanno ... pigrone!

http://www.divinacucina-blog.com/2012/12/italian-kitchen-tools-taglia-puntarelle.html


sabato 18 gennaio 2014

TAGGIASCHE IN OLIVE OIL TAGGIASCHE SOTT'OLIO

Taggiasche olives are the little black olives which are grown primarily in the regione of Liguria in the boot-shaped peninsula. They are fruity tasting olives deep black colored when totally ripe. In this case I chose ones which were almost black and placed them into large ball jars which contained 1 kg each. On top of the olives I sprinkled 100 grams of table salt. Then I immediately closed the jars with their capsules and put the jars in a cool dark room...every day for the time it takes for the salt to melt leaching out the bitter taste of the olives. This year it took about 18 days. Sometimes it takes less. So every day for the time it takes the jar must be shaken gently a couple of times. This permits the salt to continue creeping around the olives even when there is some liquid in the jar. At the end of the leaching period there will be a good quantity of liquid in the jar. Pour the olives into a large collander and give them a shake. They then must be placed on a rack which you have covered with a large clean kitchen towel in one flat level and left to dry in a cool place. After about 48 hours they should be dry and all wrinkled looking as they are in the photo above. They seem rather shriveled and ugly at this point but the magic begins when they have slept in oil for about 3 months - at this point they must be put into their large jars again. This time the jars have been washed and dried of the salt and filled 1/3with last year's oil. Some people prefer using new oil even for putting their products in oil but I have always used last year's crop since I find it does not take away from the taste of the products in oil by adding too much of it's own flavouring. Sound contradictory but I have found that new oil tends to be jealous of its space and literally takes over...so fill the jars with the olives leaving enough head space to fill the jar with oil. At this point give the jars a little shake to distribute the olives in the oil...and it is done except the capsule to cover and putting the jar into a cool dark place at least for a week. At this point you can add bay leaves and if you desire garlic cloves which you have boiled one moment in vinegar to kill any possibilities of mildew...they are ready to eat in SUMMER - I know, that's a long time but it takes quite a while for them to season. I always make enough so that I have at least two handsfull to munch right out of the salt bath. I also have a small jar for those of us who can't wait the entire seasoning period. Simple enough!
Taggiasche sono le piccole olive nere che crescono primariamente nella regione Ligure della penisola dello stivale. Sono fruttate e nero scuro quando totalmente mature. In questo caso ho raccolta quelle che erano quasi nere e messi in grandi vasi di vetro da 1kg. Su ogni kilo di olive ho cosparso sopra le olive un etto di sale fino. Poi chiudendo i vasi con i loro coperchi li ho messi in una camera buio e fresco...ogni giorno per il tempo che ci vuole per far sì che si scioglie il sale togliendo così l'acqua amara di vegetazione delle olive. Quest'anno ci è voluto 18 giorni. Certi anni ci vogliono meno giorni. Così ogni giorno affinche il sale non si scioglie il vaso va girato sotto sopra delicatemente un paio di volte. Questo permette che il sale continua attaccare sulle olive anche quando ce un po di liquido di vegetazione nel vaso. Alla fine del periodo ci sara una buona quantità di liquido nel vaso. Versare le olive in un colapasta grande e scuoterlo per togliere il liquido in eccesso. Poi le olive vanno messe in un strato  su un vasoio che avete coperte con un enorme canovaccio di cucina pulita. Questo va messo poi nella camera fredda per piu o meno 48 ore che diventano asciute del tutto e rassomigliano a quelle nella foto. Sembrano brutte e rattrapite ma la magia succede quando hanno riposate nel olio per almeno 3 mesi - a questo punto dopo l'asciugatura devono essere rimessi nei loro vasi da kilogrammo e coperte con olio dell'anno primo. Certe persone preferiscono usare olio nuovo anche per i prodotti sott'olio ma ho sempre usato il prodotto in olio nuovo perche trovo olio nuovo geloso del suo spazio invadendo il gusto di qualsiasi prodotto nella quale è messo. come se insistesse per diventare protagonista suprema (certo che lo è però un certo umiltà  a momenti...) così riempio i vasi con le olive lasciando spazio per riempirlo di olio vecchio chiudendo con coperchio. Scuoto delicatamente il vaso per assesstare le olive nel olio e poi li pongo nella camera fredda per almeno una settimana dopo di che si possono aggiungere i gusti che si preferisce. Io solitamente aggiungo solo foglie di alloro e parecchi spicchi di aglio che ho fatto bollire preventivemente in aceto e poi raffredato per far sì che non si formano muffe. E a questo punto di nuovo nella camera fredda per 3 mesi. So che è tanto tempo ma devono stagionare. E nel mentre, sapendo che sono golosità tremende ho tenute in una ciotola un paio di manate di olive salate e solo asciugate da sgrannocchiare. e poi un vaso piccino di quelli sott'olio che lascio riposare solo una settimana per quelli che non possono assolutamente aspettare 3 mesi. Facile no?

venerdì 10 gennaio 2014

Frittata in filo envelope Transformational Baker


there is a fabulous expression here which says 'where you don't have horses, run the jackasses' and that is pretty much what happens to a transformational baker who happens to not have any homemade pie crust nor other ammenities of the likes and only has a lonely bag of filo dough - about 20 sheets. So what to do in order to have a simil chard pie? Slap together 3 eggs, 3 tablespoons of grated parmaesan, salt pepper and 2 cups of sauteed chard and 1 chopped onion sauteed with the chard...don't go for the fancy stuff and when the veggies are sauteed to tender just stir it all together and then place it in the filo dough which you have previously put on an oiled parchment paper in a pie pan..making sure that between the TWO layers of filo(hard to find here and therefore only use the absolutely necessary for the absolutely wonderful taste) you add more oil (by the way, I do things with my fingers so the oil gets put on the filo in threads then I delicately spread it around....then you just pour in the frittata combination and close the envelope adding little thin threads of olive oil on top ... oven preheated to 350° till golden and the frittata is firm ... things which, considering culinary magic, strangely happens together. Cool on rack and then enjoy!

Ce un espressione da noi che dice 'se non hai cavalli fai correre gli asini' e questo succede spesso nella casa di un infornatore trasformatore come me...mica tengo pronto ne farina ne altro per fare sfoglie...ci sono piu volte che devo inventare qualcosa che no percio guarda a casa oggi con un pacchetto nuovo di trinco di pasta filo (20 foglie - impossibile trovare qui fresco e preso prima di Natale dal macellaio Hallal) allora cosa fai ... inventi una frittata in busta di filo ... che vuol dire 3 uova, 3 cucchiai parmigiano gratata, sale peppe e 2 tazze di bietole e 1 grossa cipolla a tocchi che hai precedentemente soffritti...insieme in una ciotola sbattuti bene...aspettando che prendi il filo che metti in una teglia da pie con carta forno unta di olio oliva, un foglia sopra olio poi altra foglia che con molto attenzione ungi con le dita dopo aver messo parecchi schizzi di olio sulla superficie(io uso le mani le dita ecc perche odio i pennelli da pasticcere o fosse perche con i pennelli ho meno controllo e rompo la pasta) comunque fatto questo metti dentro la pasta filo l'impasto frittata e chiudi a busta il filo ungendo delicatemente i bordi con olio oliva...in forno prescaldato 180° affinche golden e la frittata è cotta cosa che magicamente nel mondo culinario mio succede insieme ... raffredare sul solito gratticola e mangiare

venerdì 3 gennaio 2014

XMAS SWEETS DOLCI DI NATALE


Every XMAS for years here in the boot-shaped peninsula I had to bring home tons of little bags full of teeny tiny candy canes just to have my favorite XMAS sweets. They were Bob's candy canes in miniature. Sweet, minty and wonderful to suck and make into little pinpoints on the bottom part except that being teeny tiny they sort of just broke and you had to put the whole thing in your mouth so it wouldn't fall on the floor. then there were the bags of little candy cane rounds which were just popped into the mouth and all gone. Now with globalization it seems that even Bob's Candy canes have arrived here in the western edge of the boot-shaped peninsula which means tremendously difficult existential problems like how many do I buy? Do I share with friends and family? Do I give them away to the children who come to visit (honestly no children come but you might have to take an eventual toddler arriving and buy extra just in case)? And of course, after having gone through all the pains of counting calculating possible give-aways and gifts and toddlers who could or could not show up the amount is always the same ... 15...2 of which go to my daughter in Florence(can't be stingy there) and the others sit in their big white mug making me happy until I decide to gobble them up...obviously one every Sunday evening till they are gone...or one every day until they are gone...or.....GRIEF....

Ogni Natale per anni mi toccava esportare in valigia vari quantità di questi dolci alla menta favolosi. Un anno erano quelli piccini piccio che si poteva succhiare alle estremità facendo bastoncini appuntiti ma che alla fine si rompevano perche delicati e troppo piccini causando un immediato disastro la quale soluzione era di ficcare tutto il bastoncino in bocca prima che sfaccellasse. Un anno era la volta dei sacchi di mentini rondi rossi bianchi classici per i bridge parties delle madamin Useanne che, mettendo questi in ciotole belle, erano le lecca lecca sans bastone che rinfrescavano alito. Per me un goloso possibilità di mangiucchiare zucchero rosso e bianco alla menta a non finire perche come is sa la gola è un padrone infido che fin che ci siano mentini del genere nei sacchetti(come daltronde iil kg di cioccolatini nei sacchetti Natalizie) uno mica bisogna smettere di mangiarli e si va in fondo al pacco piangendo alla fine non solo per il male allo stomaco e affini ma anche perche è finito la scorta. Ma con la globalizzazione voilà la compagnia Bob's ha mandato nel boot-shaped penisola pure i candy canes i miei preferiti per Natale che onestamente sono un problema esistenziale mica indifferente perche ogni anno non so mai quanti ne dovrò comprare per esplettare tutte le mie intenzioni di regali (ma stiamo scherzando a chi li regalo?) o di infanti e bambini che potrebbero arrivare in casa anche se questa remota possibilità non succede da anni (e meno male perche se arrivano 6 bambini ne dovresti almeno darli uno a testa aggiungendo questi al elenco di quelli che vorresti mangiare tu) e infine sapendo che 2 almeno devono andare alla Figlia a firenze (mica nego al sangue di mio sangue un candy cane anche sapendo che magari non li mangia ma li lascia solo in bella mostra in cucina o altrove)...pensando a tutti questi evenienze compro ogni anno almeno 15 che meno 2 fa 13,  delle quali ho gia fatto fuori un paio o più lasciandomi con 10 in questo bel mug bianco in bella esposizione aspettando il momento della loro dipartita che potrebbe essere uno ogni domenica fino alla loro scomparsa o forse 1 ogni giorno fino alla loro scomparsa o...


lunedì 23 dicembre 2013

THE TRANSFORMATIONAL BAKER

Fig cookies   nut crust    FINISHED     TOPSIDE AND  PROFILE
Cookies Fico   Crosta mandorle nocciole    FINITI     SOPRA  E  PROFILO

DELICIOUS          SQUISITI


THE TRANSFORMATIONAL BAKER

Page 162  Southern Italian Sweets....liberally transformed into Fig Cookies...the cherry jam was finished. The fig jam was too sweet. There was no other red jam to use but we has dried figs! So following Rosetta Constatino's instructions (and using some filbert bits because logically when you shop in a hurry you NEVER get exactly what you grab and in this case I was grabbing three bags of almond bits and ended up with two infiltrated filbert bit bags) oh well, in any case the transformation was perfect...the dough is superb even raw and so after having put the fig bits onto the dough I did this
and tucked in the edges making it a bit more rectangular for easier cutting forming then these
which are now happily in the oven baking to become    FIG NEWTON NUT CRUST COOKIES....
ROSETTA your book is now the BIBLE of my baking moments...THANKS

Dovete seguire con un po di pazienza le foto sopra...facendo la spesa di corsa e volendo fare i biscotti a pagina 162 del libro di Rosetta Costantino Southern Italian Sweets ho scoperto che avevo tirato su 2 buste di pezzetti di nocciole invece che 3 bustine di mandorle in pezzetti. Poco male dico io perche potevo usare un po di nocciole per farne metà dose....ma poi a casa ho scoperto che mancava pure la confettura di ciliege(si chiamano Biscotti di Ceglie - ciliege appunto) e voilà si mette in moto la trasformazioni in Cookies di Fichi Secchi con impasto come da ricetta(se non guardi tanto per sottile l'infiltrato quantità di nocciole). Comunque in foto due ho chiuso la pasta sopra i fichi secchi e ho pressato affinche non era più rettangolare - certamente più facile per tagliare quelli che erano usciti poi nella foto 3 che sono felicemente infornati aspettando l'assaggio finale e la FOTO finish ..... ossia finita...PS: sono buonissimi anche crudi ma questo è un vizio che non ho mai visto fatto in case Italiane...e Rosetta Costantino il tuo libro è ora la Bibbia che userò quando mi viene in mente di infornare! GRAZIE

venerdì 20 dicembre 2013

THE TRANSFORMATIONAL BAKER


Your attention should be drawn to the bright sprinkles on the Little Cinnamon Cookies from the previous post since they are now decorated(the ones on the top) after having been dipped in dark 75% chocolate. The bottom foto is a hybrid Little Cinnamon Cookie which paired together to make very unusual little cinnamon cookie baci (kisses) with very deep dark chocolate FUDGE to hold them together...The transformational baker is getting back into it! after all XMAS is in 4 days!

La vostra attenzione dovrebbe essere portato verso una vista completa dei colorati zuccherini che decorano i Pezzetti di Cannella del post precedente. Ora che sono decorati con i colori dopo essere stati pucciati in cioccolato 75% quelli di sopra sembrano piu Natalizi...i Pezzetti di Cannella sotto si sono accoppiati per fare dei BACI di cannella (KISSES) con un scurissimo FUDGE al cioccolato che li tiene insieme...The Transformational Baker sta mettendosi in moto...dopotutto Natale è tra 4 giorni!

giovedì 19 dicembre 2013

The Transformational Baker

When this wonderful book arrived home I couldn't wait another moment to start baking but there first we had to finish the olive harvest. The harvest still isn't finished but M.Nature did me a huge favor and sent us a rainstorm which sort of put a stop to the olive frenzy so that I could get my hands into some cookie dough and make some Pezzetti di Cannella (Little Cinnamon cookies). As you can see my transformational baker blood sort of took over and once the dough was ready to be made into tiny pieces they sort of became, from left to right...cinnamon twists, cinnamon sticks, cinnamon stars, cinnamon bears, cinnamon double rounds to fill and if you look really closely a cinnamon elephant in the right hand corner on top...he just sort of begged to finish the last drop of dough. Rosetta the photo isn't nearly as wonderful as the ones in the book. But I made the cookies with the same recipe, the same loving care and folks ... I must tell you...this dough put XMAS into the house because the perfume of the cinnamon escaping from the kitchen went everywhere! Didn't write the recipe here but it is in the book along with many other wonderfully Southern Italian Desserts!

Quando è arrivato questo meravigilioso libro di dolci non potevo proprio aspettare un attimo per iniziare però c'era da finire la raccolta delle olive. La raccolta non è mica finita ma Madre Natura mi ha fatto un favore e ci ha mandata una bella pioggia che ha fermato la frenezia raccolta e mi ha permesso di mettere le mani in pasta di biscotti per fare un po di Pezzetti di Cannella...come you vedere il mio sangue di transformazione biscotti ha preso la mano e una volta che impasto era pronta invece di piccoli pezzetti di cannella sono usciti, da sinistra a destra...trecce di cannella, bastoncini di cannella, stelle di cannella, orsi di cannella, doppio rondi di cannella da riempire e se guardate vicino vicino in alto a destra ce anche un elefante di cannella che ha dovuto pregarmi di essere inserito nel ultimo pezzetto di impasto...Rosetta la foto non sono professionale ne bella come quelle nel tuo libro. Però i biscotti sono fatti con la stessa ricetta, lo stesso amorevole cura e GENTE ve lo dico di tutto cuore...questo impasto ha portato Natale in casa...un profumo di cannella è scappato dalla cucina e ha invaso la casa....non metto la ricetta però trovi nel libro tantissime belle ricette di Southern Italian Desserts!

lunedì 16 dicembre 2013

FUDGE FINISH C'EST FINIS il FUDGE


The end of the FUDGE story ... the fudge patties got chocolate bottoms and little chocolate caps which hid the three fork prong marks which kept my hands out of the chocolate and therefore my fingers out of my mouth to lick off the extra. One of the wonderful things about being an adult is that you don't have to ask anyone CAN I -  the only problem is that when you are an adult if you say YES to often it would actually be better just to layer the chocolate on your hips instead of putting it into your mouth cus that's where it would end up anyhow. so I have invented ways of NOT putting my fingers into chocolate or other wonderful dipping things whilst then having to put little caps on everything to hide the fork pricks. Well, you can't have everything! So the patties got their treatment. then the White chocolate coconut fudge cum mounds with a twist becamein the background two dipped bits one on each end but having found that with the fork it DOES NOT work I figured it was better to do it the other way - the long way and I created these 'mound towers' YUP with little chocolate caps to cover the cutside of the tower...nothing like a nice neat creation right...not that I am what you would call neat...but it tastes good! FUDGE FINISH? nope now I gotta make the real normal dark chocolate fudge...same recipe but only dark chocolate and walnuts - for the purists in the gift group!  

E così la storia del FUDGE è finito...quelli piatti hanno avuto una puccia nel cioccolato e piccoli capelli di cioccolato che nascondono i bucchi della forchetta che ho usato per pucciare così di non dovermi poi soffrire le pene del inferno perche non puoi mica lavarti le mani quando hanno cioccolato sopra...e succhiare le dita è favoloso quando sei grande perche non devi chiedere permesso a nessuno solo che succhiando tanto cioccolato mica è tanta furba per motivi che sappiamo - tanto vale spalmarlo sui fianchi e cosce per non disturbare sistema digestiva. Tanto va subito in quella direzione. Vabbè non puoi avere tutto e i capelli di cioccolato nascondono benissimo i buchi della forchetta e le goccette colorate sono perfette e fanno Natale. Così dicevo queii piatti erano apposto e dovevo solo sistemare quelli di FUDGE al cioccolato bianco e cocco che stranamente sembrano come gusto un tipo di mounds ma meglio...così ho fatto 'torri di mounds' con il fondo pucciato e la parte sopra un capello di cioccolato per coprire il taglio dal serpente lungo. E c'est finis dicono i francesi...mica tanto perche ho ancora da fare il FUDGE normale - stessa ricetta solo cioccolato scuro e noci per i regali alle persone che fanno puristi - amano il loro fudge con ricetta originale...

FUDGE EVOLUTION EVOLUZIONE DI FUDGE


Baker's patience. Something I had learned when I was a child - my Nahmoe(maternal Grandma) used to sit with me and we'd make milions, ok so not milions but when you are small...of rum balls, filbert fingers and various other stuff...which would take days and months and years, of so maybe not THAT long but when you are small...it sort of works up to learning how to patiently sit or stand whilst making balls or fingers or crescents etc for the holidays. Now that I have learned that patience it is funny how I sort of run out about the third batch of FUDGE ... so the evolution of FUDGE is pratically from balls to patties to long tubes...so that my patience working alone and still having to make two more very chocolatey batches doesn't wear down and disappear...so if you're really interested...go for the surgical gloves on your hands and automatically make lots of FUDGE snakes which you then let cool, cut and roll in your favorite covering...in this case I've made some coconut tropical white chocolate fudge...the recipe is so simple it is ridiculous...

1 can sweet condensed milk
3 cups chocolate bits (here used white chocolate)
1 big pinch salt
1 tsp vanilla extract
1 cup of dried tropical fruit cut into tiny itsy bitsy bits
1 cup of   coconut flakes

melt chocolate in microwave then add the condensed milk and the salt and extract....mix well with gloved hands...now the trick is to be able to find someone to put in the rest - coconut and bits of fruit...being alone I sort of just grabbed the two little cups and dumped them in and continued mixing and kneading till smooth...that's it folks ... then all you have to do is roll them into lots of snakes which you let cool, cut and then roll in your favorite covering...in this case it will be cinnamon cocoa or maybe just coconut flakes, hoping that the coconut will stick to the FUDGE cus as everyone knows FUDGE when cold get stiff and if that happens just invent something cus I still haven't reached that point and will have topost the results ASAP...note that the snakes if they appeared above are now even below..


La pazienza del fornaio...o quella cosa di pazienza ZEN che mi ha insegnata la mia nonna materna Nahmoe...sentirete parlare molto di lei perche ho imparato l'arte di dolci da lei...e la pazienza impossibile per una bambina di farne milioni di rum balls o dita di nocciole o...mica tante così ma quando si è piccoli...che poi ci volevano giorni settimane mesi da fare...vabbè quando si è piccoli il tempo non passa mai...così con la pazienza insegnatemi da lei e il fatto che da soli si lavora bene e non ricordando esattemente quanto tempo ci vuole davvero per farne 6 impasti di FUDGE...mi ero imbarcata prima con cose che sembravano pietre e poi cose che sembravano palline e poi posso dirlo CRIBBIO...la pazienza mi cominciava scappare e ho fatto i serpenti di FUDGE che alla fine vanno solo tagliati e poi ricoperti di quello che si vuole...in questo caso probabilmente cocco essicato o cacao e cannella...ma la ricetta è veramente una stupidaggine per questo FUDGE di chocolato bianco tropicale con cocco e frutti essicati tropicale (ecco il nome e il perche di tale)

1 lattina latte dolce condensato
3 tazze cioccolato  questa volta bianca ma qualunque gusto va bene
1 cucchiaino estratto vaniglia
1 pizzico 3 dita di sale fino
1 tazza frutta essicata tropicale in pezzettini ini ini
1 tazza cocco essicato

fondere cioccolato nel micro-onde (bella invenzione anche per chi non piace usarlo)..nella quale metterete latte condensato (mi raccomando usare le mani che avete precedentemente coperte con guanti chirurgici) e impastare bene mettendo poi estratto e pizzico sale fino...impastare affinche lissssia e poi se riuscite trovare qualche buon anima che ti aiuta farli mettere dentro cocco e frutta se non fate come me e sporcate le tazze con fudge ma buttate dentro tutto impastando bene con le mani...quando è lissssssia dovete poi fare tanti serpenti che metterete sul carta forno su una placca da forno e su un vasoio...raffredate benissimo, tagliate a pezzetti e rotolate in copertura a piacere...come detto in questo caso probabilmente cacao e cannella o cocco essicato (che spero si attacca perche una volta che sono asciutti i pezzi di FUDGE diventano piuttosto dure). Caso mai inventate qualcosa perche fino a questo punto non sono arrivata  - aspettate prossima puntata sul questo canale.

domenica 15 dicembre 2013

PURPLE CABBAGE CAVOLO VIOLA


The purple's have it this WINTER...fuscia purplish flowers which seemed to have decided to bloom now instead of in the Spring. Hub told me that they were Winter bloomers since they were a XMAS gift from 2011...hey, I had no idea who they were since they had risen green and happy in a big bowl-like vase but hadn't bllomed since when they were open in 2011. SURPRISE...and then there is the purple cabbage story. Yes, that gorgeous purple cauliflower was supposed to be a gorgeous purple cabbage. The bag specifically said PURPLE CABBAGE SEEDS...so figure it out. The best part is that after cooking them they REMAINED purple. Now that is what I call stupendiperous!   Even the water is borscht color. Dinner tonight is dressed in purple...not bad.

Color viola è INVERNO quest'anno...fiori viole fuscia (tipo) che sembrano essere fioriti di soppiato adesso invece che in Primavera. Marito ha detto che erano parte di un regalo da 2011. Chi si ricordava che erano fioriti a Natale quel'anno e poi spariti dalla circolazione subito dopo per riapparire ora dopo essere stati felicemente VERDE in fondose in una ciotola vaso di plastica da quella data lontana. SORPRESA....e poi ce la storia del cavolo viola. Sì, quel bellissimo cavolfiore violacceo doveva essere un bellissimo cavolo violacceo. La bustina semi leggeva SEMI DI CAVOLO VIOLA...va capire. La parte migliore però è che dopo cottura è RIMASTO violacceo. Questo sì è stupendiffero! Anche l'acqua color barbabietola. Cena stasera vestito di viola...non male.

giovedì 5 dicembre 2013

GREEN PIE TORTA VERDE

After having written my post about pies and my rather conflictual relationship with them I found myself in an interesting situation since I had found a lovely bunch of wild chard whilst climbing uphill after having finished my part of the olive work at the bottom of our property. So what to do with wild chard? Obvious if you live in Liguria, which I do...GREEN PIE    or as it is called here TORTA VERDE...you are probably asking why this pie has no crust. You are probably thinking 'hey, this looks like a spinach omelette'  and you are SO right. After having worked all day up and downhill, around olive trees, in olive piles taking out little twigs, putting kilos and kilos of olives into the red plastic containers, moving the nets and rolling them up and moving them again and putting in the big yellow plastic pins so they won't explode all over...that is a whole other post which I really must remember to write...in any case this is a GREEN PIE no crust cousin to a spinach omelette only with wild chard...simple to make too:


huge bunch of wild chard (or store bought chard) cut into big chunks
1 large spanish or italian or american or whatever nationality onion in tiny chunks...put both in a very large frying pan in which you have put at least 4 tablespoons of olive oil...and about 1/4 cup water...cover and cook until perfectly wilted

Pour the extra liquid into a large bowl, add 1 tablespoon of raw white rice...and then put the chard onion mix onto a cutting board. With a mezza luna (ligurian rocking knife) or just a good dicing knife chop up the chard onion mix till small bits...put into the large bowl with the rice and liquid. Add an open handful of grated parmaesan (about 1/2 cup), salt, pepper and 4 beaten eggs....or if you are cholesterol NO people  put in 2 whole eggs and 2 whites...mix all really well. This mixture then goes into a cake tin which you have lined with parchment which you have oiled with olive oil...into the oven at 350° till done...and if you don't have my little mother's helper gas stove you will also have a very golden GREEN PIE cum omelette...my oven refuses to golden things unless I put them under the grill...guess what? no grill today folks. I'm pooped.  Cool and transfer to plate serve and yum


La TORTA VERDE come sapete tutti è un pie ligure che solitamente ha una crosta. La mia esperienza in PIE è sempre stato conflittuale e per questo motivo quando sto tutto il giorno in campagna non è che me ne sto lì a bisticciare con soflia frolla e quant'altro...perciò avendo idea di TORTA VERDE perche nella salita dalla campagna mi ero imbattuta in una pianta enorme bellissima di bietole selvatiche che crescono felicemente da noi tutto l'anno. E questa pianta è salita con me nel secchio che solitamente si usa per mettere le olive nelle ceste. Così arrivando in casa i problemi esistenziali culinari hanno iniziati con ... crosta no crosta sì e ovviamente ha vinto la no. Avendo tutti gli ingredienti altri per la TORTA VERDE ho fatto questo:

mazzo enorme di bietole o selvatiche o comprate tagliate a pezzettoni
1 cipolla nostrana americana spagnola o quant'altro basta che sia cipolla grossa...a cubetti - entrambi poi messi in una padella enorme nella quale mettete almeno 4 cucchiai di olio oliva e 1/4 tazza di acqua...far afflosciare le bietole su fuoco vivace. Una volta  afflosciate bietole toglie dal fuoco e mettete il liquido fattosi sotto le bietole in una ciotola grande...dentro il liquido mettete 1 cucchiaio di riso bianco crudo...sopra questo mettete poi le bietole che avete tagliuzzate piccini con mezzaluna o altro tipo di coltello. In questo dovete mettere una bella manciata aperta di parmigiano grattugiato, sale, pepe appena macinato e 4 uova sbattute (se siete dei NO colesterolo - potete usare 2 uova intere e 2 albumi)...il tutto poi va messo in una teglia da forno precedentemente foderato di carta forno che avete oliato con olio oliva...infornare a 180° affinche golden....cosa che nel mio piccolo forno a gas non succede se non uso il grill...e oggi per motivi di pigrizia e mancanza di energia stanchezza e vario...ce la pappiamo lo stesso...togliere dal forno, raffreddare un po, mettere sul piatto di portata e gnum...

domenica 1 dicembre 2013

APPLE CHERRY JAM PIE PIE DI MELE E CONFETTURA CILIEGE


This is real apple cherry jam pie with just a hint of cinnamon powder and about 1/4 cup of dark brown sugar. The recipe is really simple cus all you have to do is have a jar of lonely cherry jam sitting in the dispensa. Not that the jam is lonely but that it is an only child of a widowed mother which really doesn't mean much these days but can be a problem if you have to decide whether to keep it for breakfast or use it for something else. This pie sort of just happened when I went down to the dispensa, saw the jar winking at me and remembering the fuji apples which were languishing in the cantina...sort of a pie happening which in our house is quite THE thing since I am not a pie making person. I don't do pies so this is really a first! Anyhow I brought up the 500 gram jar of cherry jam, got 8 fuji apples which I then peeled and sliced pie style...put them into a big bowl and then added some jam...then some more...and then oh heck...just dumped in the whole jarful. At this point 1/4 cup dark brown sugar (my jams are very NOT sweet) and about 1 tbsp of cinnamon powder...mixed it up with a huge spoon and then took out the pie dough from the fridge. Bet you thought I would even make the dough. NO! I am not a pie dough maker. I love to use fillo which is not available here. I DO NOT make pie crusts...maybe because I don't make pies...but then if this is a pie happening and it all sort of fell together what could be better than the photo above - that wonderful lego like construction of a pie which has holes cus I didn't have enough dough...leaked out cus I put in too much stuffing...but literally made me want to have a window sill to put it on to cool. The perfume was intense...the crust was perfect (thank you LIDL for your rettangular dough) and it was tough not to tast it beforehand! Guests loved it...and that was THE pie for this year!

Ogni anno faccio una quantità interessante di confetture che logicamente vanno dove vanno le confetture che faccio e rimangono figli di madre vedove e causano problemi esistenziali non indifferente. Colazione, cheesecake (torta formaggio americano) o quant'altro per utilizzare quel unico vaso da 500 grammi che in questo caso era di ciliege. Ero giù in dispensa rovistando e questo mi tira un urlo dicendomi 'ma ti dicedi?' e detto fatto è successo che mi ricordai che in cantina c'erano pure le mele fuji languendo in un plateaux...in frigo pure 2 pacchi di sfoglia LIDL (mica che faccio impasto per PIE - mai fatto un pie in vita mia veramente - io sono da crumble veramente) e marciai su in cucina con tutto. Tagliai le mele per pie (fettine sottilissime) messi in un enorme ciotola con un po di confettura poi un altra po di confettura e poi, dopo deliberazione interminabile buttai dentro tutto contennuto facendo sì che il pie sembrava sanguinante...e sopra questo misi 1/4 tazza moscovado e 1 cucchiaio raso di cannella in polvere mesolando tutto con un enorme cucchiaio...nota che avendo tolto la crosta dal frigo e cominciato armeggiare con pie pan (teglia da pie) ho notato che non c'era abbastanza impasto per tutto così sono rimasti dei bucchi che le persone da pie devono fare con attrezzi vari ma una persona da crumble le fa perche non riesce tirare la pasta in lungo e in largo per coprire tutto...finendolo in breve il PIE succese...e ebbi un grande successo...profumando tutta la cucina, collando ripieno sulla placca da forno che intelligentemente avevo messo sotto ma solo dopo aver avuto un piccolo lago di zucchero bruciato sul fondo forno...e gli ospiti erano felicissimi...toh

venerdì 22 novembre 2013

OLD FRIENDS VECCHIA AMICA

Onceuponatime I was in love with ceramic pottery and literally was dying to find a pot which would stay together once it was put on the stove...lammented and kept saying 'another one broke' until one day onceuponatime Hub came home with this wonderful ceramic pot ... which served me well for several years and then quietly retired into the kitchen closet where all the retired things go to rest undisturbed...Don't know if it was because I happened to see it there languishing. Don't know if it was because the above ingredients just seemed to be crying for this particular pot...but I yanked it out of retirement in time to cook this

ALL BLACK SOUP

1 onion   1 carrot   1 stalk of celery with leaves    grind fine
2 cups of black beans soaked overnight and drained
3 tablespoons of olive oil
3 pieces of sausage your choice ... at least 20cm worth
3 cups of washed and chopped black tuscan cabbage...
boiling water to cover

put the onion celery carrot into the pot with the olive oil...on top of this put the sausage cut into pieces...on top of this put the beans and then the chopped black tuscan cabbage...and over this pour enough boiling water to cover....at this point all you have to do is remember to put in the bouillion cube which you noticed in the fridge...and let simmer until....well, just remember to add water when it gets low...it's a slow cooker recipe without the slow cooker...when you think it's done add chopped tomatoes, squished garlic, more olive oil and cook another 20 minutes....stir and serve....with rustic bread obviously.

Ci sono penstole di terra cotta che rimangono amiche per sempre. Io non ho mai avuto una che ha durata piu di un paio di mesi affinche mio marito, dopo parecchi lammenti e pianti miei, non è arrivato a casa con lei...la di sopra fotografata pentola terra cotta che per anni è stata la regina delle zuppe e dei stufati slow ma che poi chissà perche è andata al pascolo nel armadio a muro della cucina dove languiva con vari altre amiche sue tipo teglie grosse e compagnia cantando. Oggi che fa freddo. Oggi che avevo gli ingredienti che richiedevano a gran voce la presenza SUA...ho visto un color terra cotta che mi ammiccava dal armadio e cosa vuoi...ho fatto questa zuppa!

ZUPPA TUTTA NERA

1 cipolla, 1 carota, 1 gambo sedano con foglie  tutti tritati finissimi
2 tazze di fagioli neri già messi a bagno sera prima e scolati del liquido
3 cucchiai olio oliva vecchia (per chi coltiva olive vuol dire quello del anno precedente)
3 salsicce toscane lunghe ... beh, lunghe un palmo tagliato a pezzettoni
3 tazze cavolo toscano nero lavato e tagliato a tocconi
acqua bollente a coprire
Nella pentola di terra mettete olio vecchio poi le verdurine tritati finissimi poi sopra questi mettete in questo ordine salsicce, fagioli, cavolo nero e acqua bollente a coprire...non dimenticando quel dado che avete visto in frigo...e poi SLOW SLOW cucinare affinche...beh affinche vi sembra cotta...non ho tempi ne modalità...per me i fagioli devono diventare un po cremosi ma interi...difficile senz'altro come cottura. Però si cuoce per un bel po ricordando di rimettere acqua bollente quando manca...e poi si aggiunge un paio di pomodori tagliuzzati, un spicchio aglio schiacciato e tritato, ancora un po di olio e si continua cottura almeno 20 minuti...dopodichè pronti ... e mi raccomando il pane rustico croccante e tagliato spesso!


lunedì 18 novembre 2013

SPRING IN A GLASS PRIMAVERA IN UN BICCHIERE

Spring in a glass or for that matter in a purple plastic bowl is a wonderful way to have fresh scallions at hand. Just put three toothpicks into the flesh of the onions which have begun to germinate, place the root part into a small glass with enough water so that it tickles the tips and watch them grow...just like we used to do with avocado seeds...onceuponatime. The purple bowl is full of iris bulbs which need to be planted ... sometime.

Primavera in un bicchiere o per quell in una ciotola di plastica viola è un modo bellissimo per avere cipolotti freschi sempre. Metti 3 stuzzicadenti nella cipolla che rimane a galla nel bicchiere con abbastanza acqua sotto che le radici vengono solleticati dal liquido e vedrai che scenderano crescendo nel umido e la parte verde salirà rigogliosa...facevamo proprio così con semi di avocado...onceuponatime. La ciotola viola è pieno di bulbi di iris che dovrebbero essere piantati...ungiornooaltro.

sabato 16 novembre 2013

NEW OIL 2013 OLIO NUOVO 2013

New Oil 2013....fruity olive flavour. Slight artichoke nip in the back of the throat. Thick olivey consistency. Acidity level below 0.01! Let's just say that it is wonderful!  PS: the sunshine coming in from the sliding glass doors reflecting in the bottle...but are we sure WINTER IS COMING?  ... temps today are 17° at 9:50!

Olio nuovo 2013...sapore fruttato. Leggero pizzico carciofoso in gola. Spessore e cosistenza oliva pura. Livello acidità sotto le 0.01! Diciamo che è meraviglioso! PS: il sole filtrando dentro le porte scorrevole della cucina riflettono sulla bottiglia...ma siamo sicuro che INVERNO STA ARRIVANDO?...temperature oggi 17° alle 9:50